Pages

Wednesday, December 31, 2014

Celebrate Today - Stampin' UP Artisan Blog Hop

Happy NEW Year!
Welcome back to the Artisan Design Team Blog Hop! We are just starting on our January 2015 box from Stampin' UP. This box was full of brand NEW products from the Stampin' UP Occasions Catalog that goes live on January 6th! I feel it is AMAZING Occasions Catalog as well as the Sale-a-bration this year is the BEST EVER! You are going to want it ALL! We have 5 Thursdays this month so each week you will see all NEW items with a variety of inspiring creations from the Artisan Design Team! Be sure to get Google Translate so that you can read in your language all about how they created their projects too. Now on to my project this 1st week...
I was immediately drawn to this fun bundle in our box of goodies! It includes the Celebrate Today Photopolymer Stamp Set and the Balloon Framelits Dies. The stamp set has so many options to create balloons of all kinds. I loved the idea of using this stamp set to create some birthday cards for the upcoming year. You can whip some great cards up in a flash with this set. Some of my favorite things on these cards are great stamping tips too! The background is the stamp set's dots that I stamped off once to get a softer look and stamped several times on the layer. I also shaped the Stamp set's balloon string into a curve. This is easy to do with the photopolymer stamps because they are flexible.
See the fun fuzzy pom poms? I made them with the Strawberry Slush Twine and the NEW Whisper White Painted Blooms Cotton Twine. I wrapped it around my finger tip about 10 times. Took a 6" piece of twine and unraveled it to just two threads strings to tie around the loops in the middle. Double knot it too! Then cut the loops and unravel the twine with your fingers. Shape your pom pom ball by trimming with scissors. I have always wanted to try making these and it fits the theme of the cards perfectly. 
Off to a great start for 2015 so far! I have some birthday cards ready!
Thanks for stopping by! I hope this inspire you!!!
Cindy
You saw my friend, Becky Cowley before me and now move on to my friend, Helene Legrand by clicking on the next button below! Be sure to stop by all 16 of us!

Friday, December 19, 2014

Be Wondrous and Merry! - Stampin' UP Artisan Blog Hop


Welcome back to the Artisan Design Team Blog Hop! We are finishing up our December box from Stampin' UP as the holiday is around the corner now. Every Thursday of each week for one full year, all 16 of us from all over the world will post on our blogs an inspiring project for you! Be sure to get Google Translate so that you can read in your language all about how they created their projects too. Now on to my project this week...a perfect little package of goodies for a last minute gift for a neighbor, co-worker or dear friend!

If I had to pick just one favorite in this year's Stampin' UP Holiday Catalog, it was this stamp set/framelits bundle! Wondrous Wreath Photopolymer Stamp Set and the Wonderful Wreath Framelits Dies! Just a few steps with stamping and rolling thru the Big Shot and BAM you get this amazing and beautiful wreath! I used the color combination of Pistachio Pudding, Wild Wasabi and Night of Navy with Whisper White and Kraft. Different for the holidays! These Take Out boxes are food safe and I just added some wax paper to line the box and cover those yummy sugar cookies. 
A simple 4 x 4 card is all that is needed to say the proper sentiment inside. I made a matching envelope with the envelope punch board with Night of Navy cardstock. I used one of the patterned DSP from the Under a Tree Specialty Designer Series Paper to bring in the Kraft from the color combo. Those Banner framelits helped to make tags for the front of the envelope! The To and From Wood Mount Stamp Set is a must have for any tag! 
I was so thrilled to learn that this stamp set and their matching framelits would still be available after the Holiday Catalog expires January 5th. You can still get it if you do not have it yet! Thanks for stopping by! I hope this inspire you for any last minute gift ideas!!
 
The whole Artisan team is off next week for Christmas Day, so be sure to stop back by on January 1st, 2015 for our weekly Global Artisan Blog Hop! We will be sharing all NEW Occasions Catalog products from Stampin' UP so you do not want to miss it!

Merry Christmas!
Cindy
You saw my friend, Becky Cowley before me and now move on to my friend, Helene Legrand by clicking on the next button below! Be sure to stop by all 16 of us!

Thursday, December 18, 2014

Fancy Friday Blog Hop - Tags Tags Tags

Welcome to the FANCY FRIDAY BLOG HOP for a
"Tags" Challenge!
My fancy friends and I are BACK! We loved working with each other so much that we decided to continue on with an all new blog hop to inspire you in fun new ways! Each month on the last Friday, we will bring to you new challenges of all kinds (color,sketch, stamp focus, etc) that you can even participate in!  This month we are doing TAGS! You may see a variety of themes on the blog hop with our tags - some Christmas or some birthday or some general themes...I went with a baby theme after seeing those cute ducks!

I am sharing a little sneak peak at a stamp set from the Stampin' UP Occasions Catalog that begins January 6th! This stamp set is called One Tag Fits All and includes 6 images with a variety of themes. It also coordinates with the Note Tag Punch. These are super easy to make! I stamped in Black Memento Ink on Whisper White cardstock both images together. Doing this, you could stamp a ton of these all at once! However, you do have to hand cut them all out! I thought these would be great for a baby shower whether a boy or a girl! I colored the images with Stampin' Blendabilities Markers in Daffodil Delight, Pumpkin Pie, Coastal Cabana and Calypso Coral. 
I used the Curvy Keepsakes Die Cut with the Kraft Cardstock for my little "box". I textured them with the Large Dots Textured Embossing Folder and sponged the dots in Versamark to make them stand out a little bit. The rest is the Clothspins to attach to box, a little Strawberry Slush and Pistachio Pudding Baker's Twine and matching sequins in the same colors. I am still in love with the colors from the 2013-2014 In Colors Collection!

Thanks for stopping by! I hope this inspire you!
Cindy

Now move on to the FABULOUS and FANCY 
Connie Collins by clicking on the next button below! 

Hello 2015 - MDS Blog Hop

WELCOME TO THE MDS BLOG HOP!
A bunch of us have joined together to share our passion for digital designing with Stampin' UP's My Digital Studio.  These ladies are SERIOUSLY talented in MDS and I am thrilled to be on this Blog Hop with them! You will find us blog hopping on the 2nd and 4th THURSDAYS of each month! We are a little early this month due to the holidays! 
This time, we are sharing what each of us are working on in MDS. I wanted to share how I am using MDS for my New Year's Eve celebrations!

I started off with an invitation! It is just a postcard that I will mail out. I used a photo for my bohek background image. I added a circle punch in white at 30% opacity. Then added a few key stamp images for the theme "Hello 2015!" The other side of the invite is just a few simple lines to give the deets. A good start, right? 
I plan to use this download When the Clock Strikes Twelve #136679 for the rest of the decorations. I plan to pull many parts of this display showing for my party with friends. I hope to share some of them with you soon! 

Thanks for stopping by! I hope this inspires you
Cindy 
Click on the button to move on to see what Cori made!

Friday, December 12, 2014

Friday Extra - Project Life Santa Fun!

Way back in September, I helped my friend Monika Davis with her Fall Retreat prepping. We get together and design projects for it. We always have such fun creating together! Monika wanted to do two things - Project Life and take group photos to fill the page with. And from there, we came up with this fun activity for one of the nights. The right side is the page that the participants created at the retreat.
We wanted to show how you could do Project Life so easily with regular Stampin UP products from the holiday catalog. We used the Trim a Tree Designer Series Paper Stack, the Santa Stache Stamp Set, Frosted Sequins, Confetti Stars Punch, Dazzling Diamonds, and All is Calm Washi Tape. That saying come from the Visions of Santa Photopolymer Stamp Set. We thought it was perfect for this amount of silliness! We had so much fun with this!
We had the ladies wear their Christmas PJs one night. We set up a photo op area with a frame, a Santa hat, a white mustache prop and let the cray cray begin! I took the individual photos and made a second page here to fit all the awesome funny photos we took. I just love this! Perhaps you can recreate it for your holiday celebration coming up! Kids AND adults would love it!

Ho Ho Ho! Merry Christmas!
Thanks for stopping by! I hope this inspires you!
Cindy

Wednesday, December 10, 2014

Hello December Gift Set - Stampin' UP Artisan Blog Hop

Welcome back to the Artisan Design Team Blog Hop! We are just mid way thru our December box from Stampin' UP. I am so excited to share fun and seasonal projects to inspire you for last minute Christmas projects as the date draws near! Every Thursday of each week for one full year, all 16 of us from all over the world will post on our blogs an inspiring project for you! Be sure to get Google Translate so that you can read in your language all about how they created their projects too. Now on to my project this week...
it's the most wonderful Hello December Project Life® by Stampin UP® Collection! Well to be honest, I made MANY projects! 
 If you have followed me on last year's Artisan Design Team Hop then you know how much I LOVE Project Life® by Stampin UP® for more than just memory keeping! There is so much you can do with these great collections whether you do memory keeping or make cards or gift boxes or more. This complete collection called Hello December is perfect for documenting a Daily December or just a December recap in general. But I wanted MORE! After making all these projects, I still have PLENTY of the collection to do my December scrapbook. That is a work in process as you read this!
Ok,it is a shame that you get only one of these bohek cards in the Accessory Pack! I used other patterns of 3x4 cards to make my flags. Those sequins are so fancy and sparkle like crazy! I just added the washi tape to a Whisper White envelope. 
 These boxes may be my favorite creations of all time! Both are so different in design. The washi tape from the PL Hello December Accessory Pack is one I think should be sold by the single roll! I LOVE IT! I taped the one box so you could still open the box without ripping the tape. Using several glue dots with the sequins to make a splash of glitter on the top. The other box, uses Paper Doilies to cover the top. I used the Note Tag Punch with a 3x4 card from the collection to make my gift tag. A piece of washi tape holds it down. That Lost Lagoon 3/8" Silky Taffeta Ribbon is so soft to make a perfect bow!
Sometimes when I open a PL collection pack of cards, I immediately want to pull cards that have great quotes and frame them! So this time, I did! I had this perfect holiday quote card pulled to the side. I had the inexpensive black frame with something else in it. I added the washi tape directly to the frame for some pattern to tie in with my theme here. I just added the 4x6 card with dimensionals after I added some flags, as well as a star and sequins from the PL collection. I had these small white pom poms for another home decor project leftover so I strung them on a piece of White Baker's Twine. I have to add that you can get the Hello December Project Life download # 138090 in MDS to make more of these 4x6 cards if you need to make more frames for gifts!
Just fill the boxes with candies and chocolates and it is a perfect 
little gift set for someone special! 
"It is more blessed to give than to receive." Acts 20:35 
It surely IS the most wonderful time of the year!

Thanks for stopping by! I hope this inspire you!!
Cindy
You saw my friend, Becky Cowley before me and now move on to my friend, Helene Legrand by clicking on the next button below! Be sure to stop by all 16 of us!

Monday, December 8, 2014

MDS Monday Sketch Challenge #93

Tami has a super sweet sketch challenge this week for you over at MDS Monday! You have to use one special photo and a flourish or two. I knew what photo I wanted to use right away! I took this photo of my daughter at the beach in September. I used the beautiful DSP called Lullably which is definitely not for just a baby theme. I love the confetti pattern as it has that trendy bohek look. I used the Convention 2012 download for my flourish around the photo. I also used the flag outline and the medallion flower image from the same download. The washi tape is from the download See Ya Next Year. Added some Gold Baker's Twine in a bow and string. 

Challenge Guidelines:
  • Please create a new MDS project for the current challenge.
  • Provide a link back to MDS Monday or use the Challenge Graphic above within your post.
  • Link directly to your Post for this challenge, not your entire blog. (So we can find your project)
  • You can create a Card, Scrap Page or 3-D Object with the Sketch.
  • The Challenge will end on Saturday December 12th @ 12pm EST. 
  • Have fun! 

You can give the challenge a try and submit your own page if you click on the MDS Monday button on the right side! 

 Thanks for stopping by! I hope this inspires you today to get into 
MDS Mondays and our challenges!
Cindy 

Thursday, December 4, 2014

25 Days - Stampin' UP Artisan Blog Hop

Welcome back to the Artisan Design Team Blog Hop! We are just starting on our December box from Stampin' UP. Plan to see lots of Project Life® by Stampin' UP®...just sayin! I am so excited to share fun and seasonal projects to inspire you for last minute Christmas projects as well! Every Thursday of each week for one full year, all 16 of us from all over the world will post on our blogs an inspiring project for you! Be sure to get Google Translate so that you can read in your language all about how they created their projects too. Now on to my projects this week using the 25 Days Photopolymer Stamp Set.
I went to my studio to make a card with the All is Calm DSP and THIS is what I made! Ever do that? WAY beyond simple card! I was inspired by many Pinterest Advent Displays that I have seen there. I love the idea of counting down to Christmas but I even love it more for just a reminder of these 25 days of December.
I used just two patterns of the All is Calm Specialty Designer Series Paper, the Smoky Slate trees and the only silver embossed dotted pattern. I stamped with Metallic Gold Encore Ink and then embossed with Gold Powder. After punching with various circle punch, hexagon punch and even one tree framelit from the Snowflake Card Thinlits Dies, I added them with dimensionals to the cut Star Framelit Dies pieces. Branch from my backyard is the anchor for the Gold Satin Ribbon hanger. I used gold thread to hang my stars. I also hung some All is Calm Snowflake Embellishments.

But wait...I have one more very simple home decor project for you!

We started celebrating the Advent Season this past Sunday. I had bought this silver charger and 4 candles to just have out to light each Sunday. BUT you know you HAVE to "Stampin UP" it! I added the beautiful pattern paper from the All is Calm SDSP, some burlap ribbon and a cut snowflake from the Snowflake Card Thinlits Die. Have you seen this done? You basically take a piece of Whisper White thru your Big Shot, pull off and line up the uncut part on framelit again and send thru again. I stamped it after with Smoky Slate and the snowflake from the Letterpress Winter Stamp Set. Again stamping and embossing the 25 Days Stamp Set here and adding with Fast Fuze and Dimensionals. Then I took a whole container of the Frosted Sequins and spread them around the candles. I even added some gold sequins off the Gold Sequins Trim. When I put away the decor in January, I will just place back in container.
It is not too late to decorate for this year's 25 days countdown to Christmas!
Thanks for stopping by! I hope this inspire you!!
Cindy
You saw my friend, Becky Cowley before me and now move on to my friend, Helene Legrand by clicking on the next button below! Be sure to stop by all 16 of us!

Bright Christmas - MDS Blog Hop

WELCOME TO THE MDS BLOG HOP!
A bunch of us have joined together to share our passion for digital designing with Stampin' UP's My Digital Studio.  These ladies are SERIOUSLY talented in MDS and I am thrilled to be on this Blog Hop with them! You will find us blog hopping on the 2nd and 4th THURSDAYS of each month! We are a little early this month due to the holidays! 
Inspired by colored chalkboard Christmas cards, here is what I came up with to capture one of our favorite things to do! The tree is from Jingle and Joy download and it has red star and ornaments but I changed it to match my "merry and bright" theme. I have to say that the coloring tool is SUCH fun to use on the stamp images. It is the "artist" in me! I also love the re-coloring tool on embellishments. I took Sara's Sequins download and re-colored a few of them for the ornaments on the tree.

Thanks for stopping by! I hope this inspires you to get into a little MDS coloring!
 Cindy 
Click on the button to move on to see what Cori made!

Monday, December 1, 2014

MDS Monday Sketch Challenge #92

Back for a new MDS Monday Sketch Challenge! And guess what? I got to create the challenge this week! Ok, so it is a good one and most challenging cause it is double the trouble! Come on you can do it! December has arrived and I thought it would be great to make a double page layout for those thousands of Christmas pictures you took or will take soon! Another idea would be to change the trees to snowflakes for a snow pictures.....another idea would be ornaments for tree decorating pictures....see the possibilities? What can you come up with?  (you can do a single page layout if you like too!)
I took the layout as it was designed and re-colored the trees to Lost Lagoon. Then I used Designer paper from the Daily December Memories download. The stamp image for my title also comes from the same download. The snowflakes both stamp images and punch shapes come from the Festive Flurries download. I also like the option of filling some of the photo areas with Designer Series Papers if you do not have enough photos for this double page layout. 

Challenge Guidelines:
  • Please create a new MDS project for the current challenge.
  • Provide a link back to MDS Monday or use the Challenge Graphic above within your post.
  • Link directly to your Post for this challenge, not your entire blog. (So we can find your project)
  • You can create a Card, Scrap Page or 3-D Object with the Sketch.
  • The Challenge will end on Saturday December 6th @ 12pm EST. 
  • Have fun! 

You can give the challenge a try and submit your own page if you click on the MDS Monday button on the right side! 

 Thanks for stopping by! I hope this inspires you today to get into 
MDS Mondays and our challenges!
Cindy 

Wednesday, November 26, 2014

Gift Box and Ornaments - Stampin' UP Artisan Blog Hop

Welcome back to the Artisan Design Team Blog Hop! We are finishing up our November box from Stampin' UP. This box was full of Christmas kits and stamps from the Stampin' UP Holiday Catalog! I am so excited to share fun and seasonal projects to inspire you! Every Thursday of each week for one full year, all 16 of us from all over the world will post on our blogs an inspiring project for you! Be sure to get Google Translate so that you can read in your language all about how they created their projects too. Now on to my project this week...punch board packaging with handmade ornaments!
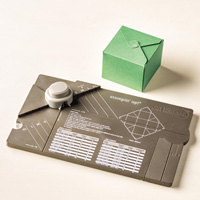
We received the Gift Box Punch Board in our box this month and I was so excited to finally get to play with it! Over the weekend, I made several size boxes with Whisper White cardstock to make a boxed snowman (share that later). I especially liked the 4x4x4 size box made from a 12x12 sheet of cardstock so I decided that I wanted to showcase this size as some easy to make gift boxes. Well as you can see it went way beyond that! I HAD to make something to put in them! TA DA....
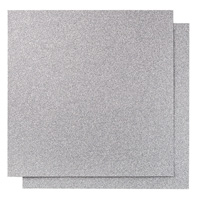
I have been seeing these ornaments all over the place. Stampin UP even made some like this for the Founder's Circle event! I used Silver Glimmer Paper and the Dazzling Diamonds Glimmer Paper to make my ornaments. They are really easy but they require you to punch HUNDREDS lots of them! One 12x12 sheet makes 2 ornaments if you punch them right. I used my hot glue gun to attach to a clear plastic ornament (local craft store) and you can follow a video HERE by the talented Dawn Griffith (LUV HER) to make them. I added Stampin UP ribbon for the bows and the twine from the kit for the hanger. I need to get some more colors of that 5/8" Satin Ribbon. It looks so pretty in the Gold! I know I am going to give these away but they look so good on my tree! Wahhhhhh!
 I wanted to make cute tags using the Under the Tree Tag a Bag Accessory Kit. I added some more patterned paper using the Trim a Tree Designer Series Paper Stack. I used a simple color combo of Pistachio Pudding, Garden Green, Crumb Cake, and Whisper White. Can you see these also done with the remaining green, red and brown tags from the kit?

Here are the close ups of each tag. Click on the photo to see enlarged. Very simple with stamped images from the Cheerful Tag Stamp Set. That is a MUST HAVE stamp set for this holiday of gift giving!
Thanks for stopping by! I hope this inspire you to create these handmade holiday gifts and packaging for that someone on your Christmas list!
Cindy
You saw my friend, Becky Cowley before me and now move on to my friend, Helene Legrand by clicking on the next button below! Be sure to stop by all 16 of us!