Monday, March 30, 2015

MDSM Sketch Challenge #107 Freeform a Story

I am bringing an oldie but a goodie back around for the MDS Monday Challenge. Bring up that Freeform Tool, add some shape to it and then add journaling text to it! If you can read what is in my sample text, it will give you some tips or suggestions. Capture the memory and tell a story of a special single photo!
 
 Challenge Guidelines:
  • Please create a new MDS project for the current challenge.
  • Provide a link back to MDS Monday or use the challenge graphic above within your post.
  • Link directly to your post or mydigitalstudio.net sample page for this challenge, not your entire website (So we can find your project)
  • You can create a card, scrapbook page or 3-D object with the sketch.
  • The Challenge will end on Saturday April 4th @ 12pm EST. 
  • Have fun! 
You can give the challenge a try and submit your own page if you click on the MDS Monday button on the right side! 

 Thanks for stopping by! I hope this inspires you today to get into 
MDS Mondays and our challenges!
Cindy 

Thursday, March 26, 2015

Fancy Friday Blog Hop - From the Herd

Welcome to the FANCY FRIDAY BLOG HOP for a
"Masculine" Challenge!
My fancy friends and I are BACK! We loved working with each other so much that we decided to continue on with an all new blog hop to inspire you in fun new ways! Each month on the last Friday, we will bring to you new challenges of all kinds (color,sketch, stamp focus, etc) that you can even participate in!  This month we are doing MAKE IT MASCULINE YET FANCY FRIDAY! We are showing projects for the men that suits our fancy and we hope you give it a try too!
I must say working with this stamp set made me...laugh. It is called From the Herd and can be found on Page 15 in the Occasions Catalog. The coloring part of it just reminded me of being back in art class. I used watercoloring with Classic Ink Pads with my Aqua Painter. The layer is not watercolor paper. I used the Naturals White Cardstock. When you use this technique on this type of cardstock just be sure to use less water. I love the softer watercolor look on this cardstock and the bits of speckles in the cardstock showing. I also fancy cut that balloon out and popped it with dimensionals. I have the perfect person in mind to send this to. Her birthday is coming up soon and they own a "farm" in their own backyard! If I send this card to her, her husband might get the idea to get the bull/cow and the lama to add next to their own herd! (Don't do it Turner!)
So here is my oops version! It really turned out NOT like I wanted it to go but I finished it anyways. My thought was..."hey, do the animals like all muddy like they just got into a messy mud fight on the farm with just the white of their eyes showing like oops we are caught". Does it say that or I am off? I added some mud splatters from Gorgeous Grunge Stamp Set too. The wording from the stamp set just fit this card so well. Turner might get this card after his next messy farming experience occurs! 
 
Thanks for stopping by! I hope this inspire you!
 
Cindy

We have the fancy and fabulous Kimberly Van Diepen joining our blog hop tonight!!!! She is the BOMB! She oozes FANCY and we are all so happy that she is joined us this month! Be sure to check out all of 11 of our fancy yet masculine projects!
 
Now move on to the FABULOUS and FANCY 
Connie Collins by clicking on the next button below! 

Wednesday, March 25, 2015

Simply Pressed Clay - Stampin' UP Artisan Blog Hop

Welcome back to the Artisan Design Team Blog Hop! We are finishing up our March 2015 box from Stampin' UP. This box was full of more brand NEW products from the Stampin' UP Occasions Catalog! Every Thursday of each week, all 16 of us from all over the world will post on our blogs an inspiring project for you! Be sure to get Google Translate so that you can read in your language all about how they created their projects too. Now on to my projects this 4th week...a hodge podge of things in our March box.
I really wanted to use the Simply Pressed Clay Alphanumeric Mold from our box..............just in a different way. It is made of rubber you know so why not make it a stamp? I used Crushed Curry Ink Pad and inked it up. It was an a-ha moment I must say! To finish up the first card, I used leftover pieces from the Hello Life Project Kit (after making Kaitlyn's notecards) to make a teacher's thank you card. That end of the school year is drawing near so time to think about it! 
Then I used Blushing Bride Ink pad with the mold so that I could make a baby card. I paired it with the Sweet Dreams Designer Washi Tape, the Sweet Dreams Designer Buttons, and the Little Sunshine Stamp Set from the box. So sweet! Who is having a baby girl?

And there you have our March Artisan box in a nutshell.
Thanks for stopping by! I hope this inspire you!!!
Drop by our Pinterest page too! 
See all of our present and past Artisan projects!
Cindy

You saw my friend, Becky Cowley before me and now move on to my friend, Helene Legrand by clicking on the next button below! Be sure to stop by all 16 of us!

Wednesday, March 18, 2015

Hello Happy Life Decor - Stampin' UP Artisan Blog Hop

Welcome back to the Artisan Design Team Blog Hop! We are just showcasing today our Facebook Project for the March 2015 box from Stampin' UP. This box was full of more brand NEW products from the Stampin' UP Occasions Catalog! Every Thursday of each week, all 16 of us from all over the world will post on our blogs an inspiring project for you! Be sure to get Google Translate so that you can read in your language all about how they created their projects too. Now on to my Facebook project this 3rd week...
I kind of got this idea from my friend Monika. She has purchased several of these Hello Life Project Kits for just the cool looking wire frame! She is planning to use them in her new classroom along one wall to display card samples. With that thought, I wanted to use just the wire frame from the kit as well. Then comes the Hello Life Photopolymer Stamp Set into the picture. I just adore the large image quote stamp. To me, it is a statement that you should be reminded each and every day. Do more of what makes you happy! (like stamping,creating,etc)  

Just a few details about this project:
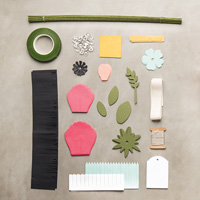
The background of the 5x7 center image is just ink to paper with the Aqua Painter on Whisper White Cardstock. I used Soft Sky, Pool Party, Pear Pizzazz and Smoky Slate Classic Ink pads. I pulled two Coastal Cabana flowers from the Build a Bouquet Project Kit and tied them to the wire frame with Pear Pizzazz 3/4" Chevron Ribbon. I also used the Clothespins and the Essentials Wooden Elements for a touch of wood and another tone/texture on my project. To make my little flag, I just traced the flags from the kit and cut them.

Thanks for stopping by! I hope this inspire you to do more of what makes you happy!!!
Be sure to leave comments over on Stampin UP Facebook page! We love to hear from you!
Cindy

You saw my adorable friend, Becky Cowley before me and now move on to my uber talented friend, Helene Legrand by clicking on the next button below! Be sure to stop by all 16 of us!  Also check out all of the Artisan projects over on our Pinterest Page

Monday, March 16, 2015

MDS Monday Sketch Challenge #105

This week over on MDS Monday, Anita had a spring-y theme challenge for us! I love how she added the flower silhouette so I just had to you use it for my page as well. I have not taken much spring-y pictures recently (we just had our first real spring like temp day yesterday which I spent cleaning out our horder-like garage). So I looked back at last year's spring time photos and found this gem. These ladies mean the world to me!
Challenge Guidelines:
  • Please create a new MDS project for the current challenge.
  • Provide a link back to MDS Monday or use the challenge graphic above within your post.
  • Link directly to your post or mydigitalstudio.net sample page for this challenge, not your entire website (So we can find your project)
  • You can create a card, scrapbook page or 3-D object with the sketch.
  • The Challenge will end on Saturday March 21st @ 12pm EST. 
  • Have fun!

You can give the challenge a try and submit your own page if you click on the MDS Monday button on the right side! 

If you are looking for some more digital scrapbooking fun, drop by this Tuesday night the 17th on Facebook for two new challenges on our MDS Virtual Digi Crop hosted by Monika Davis and myself. Just search for the group name and we will add you to the group. We start at 7:30pm and give you til Thursday night to complete your challenges and post them for all to marvel at! 
Hope to see you there!

 Thanks for stopping by! 
Cindy 

Wednesday, March 11, 2015

Sheltering Tree - Stampin' UP Artisan Blog Hop

Welcome back to the Artisan Design Team Blog Hop! We are just starting on our March 2015 box from Stampin' UP. This box was full of more brand NEW products from the Stampin' UP Occasions Catalog! Every Thursday of each week, all 16 of us from all over the world will post on our blogs an inspiring project for you! Be sure to get Google Translate so that you can read in your language all about how they created their projects too. Now on to my project this 2nd week...
I am truly blessed. I am blessed because I have wonderful, caring, sweet friends all over the world! I love my friends and they each mean so much to me!

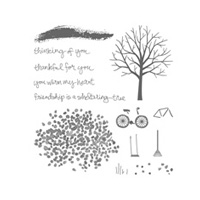
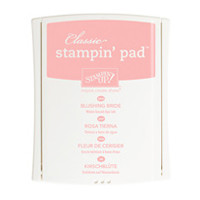
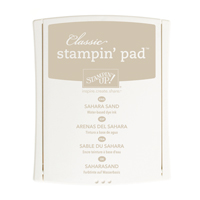
I immediately wanting to use this beautiful stamp set called Sheltering Tree. The tree reminds me of spring cherry blossoms and therefore Blushing Bride was my go to color. I paired it with Sahara Sand, Whisper White and Mossy Meadow. The bottom layer of blossoms was just stamped ink to paper. Then I stamped it again and got out my Blushing Bride Embossing Powder to emboss that layered. Did you know that the new ink pads can hold embossing powder? Stampin' UP CEO Shelli did it on a video and I HAD to try it! It works!!! I like how it adds dimension to the tree. The envelope flap is dry embossed with the Spring Flowers Textured Impressions Embossing Folder for just an added touch.
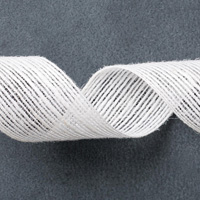
It is great when you can make a matching gift box with just a few items! Did you see that White Jute Ribbon in the Occasions Catalog? It makes such a pretty bow for a gift box. I took a 12x12 piece of Sahara Sand and use my Gift Box Punch Board. I love this size of box! Perfect to hold a little gift for a dear friend. I used the Ornate Tag Topper Punch to make my tag. Love that the larger pearls and Blushing Bride rosette trim are available in the Artisan Embellishment Kit!

I hope this inspire you!!!
Thank you my friends for always stopping by and leaving comments when you do! 
They truly make my day!
Cindy
You saw my creative twin, Becky Cowley before me with her adorable cards and now move on to my friend, Helene Legrand by clicking on the next button below! Be sure to stop by all 16 of us!