Showing posts with label punch art. Show all posts

Wednesday, July 15, 2015

Words of Truth - Stampin' UP Artisan Blog Hop

Welcome back to the Stampin' UP Artisan Design Team Blog Hop! 
We are just starting on our July 2015 box from Stampin' UP. 
This box was FULL of more BRAND NEW products 
from the Stampin' UP 2015-2016 Annual Catalog!!!!! I am pretty proud and humble to say that I was asked to pick the contents of this box as well as our weekly themes! (Of course, my teammates helped me with telling me what was on their wish list!) We are going to do a little peak into 5 of the 10 occasion sections from the NEW catalog this month! So you do not want to miss any of the projects this week! We are showcasing the "Kids" section on page 39-48. Remember that every Thursday of each week, all 16 of us from all over the world will post on our blogs an inspiring project for you! Be sure to get Google Translate so that you can read in your language all about how they created their projects too. Now on to my 3rd project for July and the Facebook Monthly Artisan Showcase....
I loved the sayings in this stamp set called Words of Truth. They are so fun! Especially the "I love you more than grilled cheese" so I HAD to make something to go with the idea. So I grabbed the NEW Sketched Dots Tag a Bag Gift Bag (psst...they are food safe so I added a grilled cheese in there!) and added a Tangerine Tango pattern strip of Schoolhouse Designer Series Paper. My favorite part was the heart. I covered the back of heart with Fast Fuse. Then I did a technique I like to called "miniature string art". I took the Metallic Gold Thread and wrapped it around and around and around the heart. You have to keep it pulled tight and make sure it sticks to the back to keep it in place.  
Then just for some more fun, I made a super simple card using much of the same items. I used more patterns from the Schoolhouse Designer Series Paper, Star Collection Framelits, more Metallic Gold Thread and Brights Sequins on Crumb Cake card base. 

Thanks for stopping by! I hope this inspires you! 
Cindy
You saw my friend, Becky Cowley before me and now move on to my friend, Helene Legrand by clicking on the next button below! Be sure to stop by all 16 of us!
Built for Free Using: My Stampin Blog

Wednesday, November 26, 2014

Gift Box and Ornaments - Stampin' UP Artisan Blog Hop

Welcome back to the Artisan Design Team Blog Hop! We are finishing up our November box from Stampin' UP. This box was full of Christmas kits and stamps from the Stampin' UP Holiday Catalog! I am so excited to share fun and seasonal projects to inspire you! Every Thursday of each week for one full year, all 16 of us from all over the world will post on our blogs an inspiring project for you! Be sure to get Google Translate so that you can read in your language all about how they created their projects too. Now on to my project this week...punch board packaging with handmade ornaments!
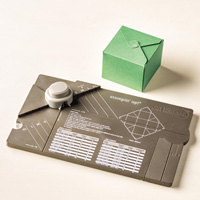
We received the Gift Box Punch Board in our box this month and I was so excited to finally get to play with it! Over the weekend, I made several size boxes with Whisper White cardstock to make a boxed snowman (share that later). I especially liked the 4x4x4 size box made from a 12x12 sheet of cardstock so I decided that I wanted to showcase this size as some easy to make gift boxes. Well as you can see it went way beyond that! I HAD to make something to put in them! TA DA....
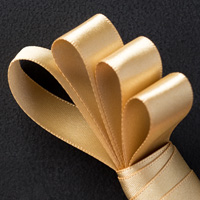
I have been seeing these ornaments all over the place. Stampin UP even made some like this for the Founder's Circle event! I used Silver Glimmer Paper and the Dazzling Diamonds Glimmer Paper to make my ornaments. They are really easy but they require you to punch HUNDREDS lots of them! One 12x12 sheet makes 2 ornaments if you punch them right. I used my hot glue gun to attach to a clear plastic ornament (local craft store) and you can follow a video HERE by the talented Dawn Griffith (LUV HER) to make them. I added Stampin UP ribbon for the bows and the twine from the kit for the hanger. I need to get some more colors of that 5/8" Satin Ribbon. It looks so pretty in the Gold! I know I am going to give these away but they look so good on my tree! Wahhhhhh!
 I wanted to make cute tags using the Under the Tree Tag a Bag Accessory Kit. I added some more patterned paper using the Trim a Tree Designer Series Paper Stack. I used a simple color combo of Pistachio Pudding, Garden Green, Crumb Cake, and Whisper White. Can you see these also done with the remaining green, red and brown tags from the kit?

Here are the close ups of each tag. Click on the photo to see enlarged. Very simple with stamped images from the Cheerful Tag Stamp Set. That is a MUST HAVE stamp set for this holiday of gift giving!
Thanks for stopping by! I hope this inspire you to create these handmade holiday gifts and packaging for that someone on your Christmas list!
Cindy
You saw my friend, Becky Cowley before me and now move on to my friend, Helene Legrand by clicking on the next button below! Be sure to stop by all 16 of us!

Wednesday, November 19, 2014

Christmas Card 2014 - MDS Blog Hop

WELCOME TO THE MDS BLOG HOP!
A bunch of us have joined together to share our passion for digital designing with Stampin' UP's My Digital Studio.  These ladies are SERIOUSLY talented in MDS and I am thrilled to be on this Blog Hop with them! You will find us blog hopping on the 2nd and 4th THURSDAYS of each month! We are a little early this month due to the holidays! ALSO we have a guest blogger this month of November! MONIKA DAVIS She is my dear friend and my "partner in crime" with our MDS biz. Believe me, she knows her MDS! So this blog hop is all about WHAT YA DOING in MDS?
Seriously I was wondering what to do for this blog hop when I looked at my calendar and realized that it was NOVEMBER 16th! Thanksgiving is next week! HOLY MOLY! I needed to get my butt in gear and get a holiday card designed asap! I gotta get them into the printer to get back in time to send out BEFORE Christmas!
FRONT OF CARD
BACK OF CARD
I have been seeing alot of black, white, red and gold themed Christmas decorations out there! I find the color theme very elegant. So I was inspired by my visions of that decor for my design. To get the curve of white around the photo, I used the leaf punch blown up to get that perfect curve. You can see how I use it HERE as well on a calendar. I am also loving the long look of a postcard photo card. What is so great is that you get envelopes with these when you print thru Stampin UP! MDS print services! I plan to get this card printed for family, friends and church family this year so watch out some of you are getting a preview! LOL

Thanks for stopping by! I hope this inspires you to get your Christmas photo cards done ASAP
 Cindy 
Click on the button to move on to see what Cori made!

Wednesday, September 24, 2014

Caramel Apple Treats - Stampin' UP Artisan Blog Hop

Welcome back to the Artisan Design Team Blog Hop! We are working on to our September box from Stampin' UP. This box was full of products from the Stampin' UP Holiday Catalog! I am so excited to share fun and seasonal projects to inspire you! Every Thursday of each week for one full year, all 16 of us from all over the world will post on our blogs an inspiring project for you! Be sure to get Google Translate so that you can read in your language all about how they created their projects too. Now on to my project this week...

The first day of Fall arrived on Monday and thankfully the weather here this week has even cooled down enough to really think that Fall IS really here! And with that comes apple picking time!  I hope that we can make time soon to head up to the apple orchard in northern GA for some great family time and yummy apples! I love a good apple pie! 
This cool weather and the thought of apples inspired this little cute treat! I used the Curvy Keepsake Framelit Diecut with Baked Brown Sugar cardstock to make the "caramel covered apple". I glued it down onto one of the Paper Doilies and a 2.5" Whisper White circle punch. To get the mini Real Red apple, I used the tag from the Curvy Keepsake Framelit Diecut. TIP: use your paper snips to hand cut the bottom shape of the apple shown above. 
I recently bought these 7.5" black and white straws from a local store. I cut one inch off them to make them 6.5" long. Then took the bottom 2.5" of the straw and flatten it with my bone folder so that it could slide into the curvy box opening between the two handles.
I think I will fill these treats with some of my favorite caramel candies and give them to my friends. Perhaps with an apple or two from the Ellijay orchards too!


Thanks for stopping by! I hope this inspire you today!
Cindy
You saw my friend from Utah, Becky Cowley before me and now move on to my friend in France, Helene Legrand by clicking on the next button below! 

THANK YOU FOR THE OVERWHELMING POSITIVE RESPONSE TO THIS PROJECT! YOU ALL HAVE MADE ME VERY HAPPY THAT YOU LIKED IT THAT MUCH!

Tuesday, April 22, 2014

High Tide GIVEAWAY= Artisan WOW

Welcome back to Artisan Wednesday WOW! We have an extra special GIVEAWAY for you this week! This High Tide Product Suite in the 2014 Occasions Catalog had me at AHOY!  I was able to make a whole set of baby boy nautical projects with the High Tide Designer Series Paper and the Hello, Sailor Stamp Set. You can do the same! Do not miss the boat, you can win these great products right here!

On this card: I just ran lines with my Calypso Coral Stampin' Up Write Marker across the card base. I used the Circle Collection Framelits to cut my life preserver shape. To get the stamp images to line up, use your Stamp-a-ma-jig!
This is the Mini Muslin Bag! I took out the drawstring and hot glued the ribbons onto the bag. Now it is a mini tote gift bag! 
I took the Burlap Ribbon and wreath base from the Burlap and Blooms Simply Created Wreath Kit to use here. The flowers were used on other project to share soon! I used the Banner Framelits Dies to make the banner across my wreath. 
 This boat was actually free standing but then I decided to add it to the wreath. See the sail mast? That is a rolled piece of the High Tide DSP!  I used the Circle Collection Framelits Dies to make the bottom of the boat. Cut a simple triangle with the DSP and Whisper White cardstock and cut a slit for the mast to go thru. The Bitty Banners Framelits Dies helped finish off the top and name plate.
More Banner Framelits Dies with this great High Tide DSP make a great layered thank you card!  I used two of the Hello Sailor Stamp Set images all together with the Lots of Thanks Stamp Set.
Thanks for stopping by! I hope this inspires you to try the High Tide Suite before time runs out!
Cindy
Move on to Connie by clicking on the next button!
Enter below on Rafflecopter and let me know that you did all 4 entries!

Wednesday, May 9, 2012

Spring Flowers

Totally inspired by the latest Scrapbook Etc magazine but with Stampin Up products. The stamp set Mixed Bunch was in the Mini Occasions catalog and I was thrilled when it was carried over into the new Stampin Up catalog coming out June 1st! I used Lucky Limeade Baker's Twine for the stems. To add - punch a hole with a paper piercer in the spots you want to place the stems. To get the leaves, I stamped the circle medallion stamp image and then punched out the shape of the leaf with a 1 3/8" circle punch. The flowers were punched with the Blossum punch which also carried over to the new catalog. The flowers were popped up with dimensionals.
Ready to add a beautiful spring picture of my girls!
Thanks for stopping by!
Cindy

p.s. Trying a new look on the blog. MDS makes it so easy to change over and over.

Tuesday, January 17, 2012

A birthday party gift package! Completely in MDS!

I made this ensemble birthday package for a co-worker last week.  It was very simple to create using My Digital Studio.  Warning - this is a SUPER LONG post so hang in there til the end!
I first started to create it by adding the scallop pennant punch in different colors then adding Sweet Details Alphabet. When you add the punch without changing the size then you will be able to punch it out with the real punch. Used the 1/8" hole punch and threaded Baker's Twine thru them.

 I also add some plain scallop pennant punches and filled them to create the cake banner. Then I did did the same with the simple pennant punch for the inside of my card. Just love this!
Then I created the card front and printed it out as a 5x7. I added it to a piece of 10 x 7 Tempting Turquoise cardstock.  The inside banner folds up nicely.
 The card front was easy to create from a case that I had seen. I added a small circle punch, sized it down and copied and pasted it like a zillion times. Then filled with colors like Garden Green, Rich Razzleberry, Tempting Turquoise, Orchid Opulence, Lucky Limeade, Calyspo Coral, Melon Mambo and Peach Parfait.

Then I took the same card front and made a fun 5 x 7 frame insert. Added the original sweet sentiment from the case. I used some of the punched scalloped pennants to place on the outside of the frame.

Whew! That was ALOT of cover so I hope you made it all the way thru it. 
What can My Digital Studio NOT do?  Your imagination is umlimited!
I hope this inspires you to get on your computer/laptop and give it a go!
Cindy