Showing posts with label gift box punch board. Show all posts

Sunday, April 2, 2017

Nurture Nature with the Creation Station Blog Hop

Welcome back this month with the Creation Station Design Blog Hop! I was beyond thrilled to join this group of talented women that inspires me! We plan to inspire you each month with Stampin' UP! creative top of the line projects with a theme from all around the globe! We hope that you hop thru each blog and leave comments as we all love to hear praise about our creations!

This month our theme was Nurture Nature or Flowers to Showers. 
Well.....a cactus count as nature, right? I was at my friend Monika's Stamp, Scrap and Create Retreat last weekend and one of the lady there had the Birthday Fiesta Photopolymer Bundle which I have been on the fence about getting myself. I mean I bought the bright and fun Festive Birthday Designer Series Paper so what is the hold up?
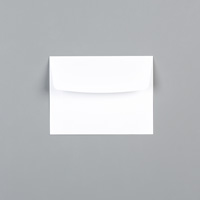
I love a good shaker card but making them is time consuming. This was super easy to create with the Fringe Scissors, cardstock and the Clear Envelopes. I just slide a piece of Whisper White in one half of the envelope, added the cut pieces of cardstock and folded the envelope in half. I secured it with washi tape and use my bone folder to make the folded edge crisp. I stamped the cactus in Emerald Envy on Emerald Envy cardstock. The greeting comes from Sunshine Sayings Stamp Set.
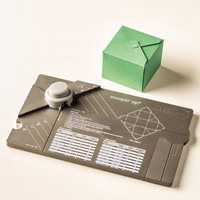
Why not make a matching gift box too? This is a 3.25 x 3.25 x 2.5 size box made with the Gift Box Punch Board. I have a whole spool of this Melon Mambo 1/8" Stitched Ribbon and it is stiff enough to make a large bow with it. 
Thanks for stopping by my post for the Creations Station Blog Hop!
Inspire. Create. Share. That's what I love to do.
Cindy
You saw Dena's awesome project before me and now move on to 
Denita's incredible project by clicking on the next button below! 
Dena Rekow

Denita Wright

Come join us in May to get free tutorials, live video classes and more!

Thursday, April 21, 2016

Stampin' UP Artisan Blog Hop - Gathering Mother's Day Flowers

Welcome back to the 2015-2016 Stampin' UP Artisan Design Team Blog Hop! 
I am so blessed that I get to create and inspire with these amazing Stampin' UP products and share with you all here for another wonderful year! Remember that every other Thursday, all 20 of us from all over the world will post on our blogs an inspiring project for you! Be sure to get Google Translate so that you can read in your language all about how they created their projects too. Please keep hoppin' thru them all....you do not want to miss anyone of these amazing ladies!

This week we are showcasing our Artisan projects for the Stampin' UP Facebook Page this month. For this project, the team was to focus on the two tools and three stamp sets with a "Perfect Packaging" for a Baby or Bridal Shower or Mother's Day so plan to see A LOT of different design styles with these selective products as you move thru the blog hop! 
I choose to use the Gift Box Punch Board with the Circle of Spring Stamp Set and the Botancial Builder Framelits Dies to create a Mother's Day packaging. The Gift Box Punch Board is great for making MANY different sizes of boxes but I choose to make a gathering basket from a box. Simple to make really: just make any size box you want and score only two sides, leave the other two sides open and add a handle. I added some fresh cut flowers inside a Polka Dot Cone Cellophane Bag and tied with Rich Razzleberry 1/4" Cotton Ribbon. I stamped the wreath image in Old Olive ink and used the matching Wonderous Wreath Framelits Dies to cut out. To finish, add some beautiful flowers with the Botanical Builder Framelits Dies. 
So here is a cute little box made with the Gift Box Punch Board. The highlight of this piece is the Botanical Builder Framelit Dies and the Corrugated Kraft Paper. I placed the flower and the pieces on a 1 1/4" Circle Punch piece of Window Sheet so that the linen thread it attached for a belly band on the box.

For the card, I made a few more SEVERAL flowers using the Botanical Builder Framelits Dies in the shades of purples like Rich Razzleberry, Elegant Eggplant, Perfect Plum and the retiring Blackberry Bliss. I used Kraft Cardstock with the Stylish Stripes Textured Impressions Embossing Folder for a textured background. 
Now if you want, add a tag on the box too! All the greetings I used on these projects are from the Circle of Spring Stamp Set. I got a piece of Brighton jewelry for my mom while I was in the Salt Lake City recently. I was there attending the Stampin' UP Onstage Live event where we got to see all the new products coming soon! 
You are going to love it! Trust me! We on the Artisan Team will be sharing some new products in June so be sure to tune in then!

Thanks for stopping by here and if you leave a comment then thanks for truly making my day!
Inspire. Create. Share. That's what I love to do.
Cindy

Now on to one of my dearest friends and Artisan Design Team sister for life.....Connie Collins! She will blow your mind!


Wednesday, October 21, 2015

Jolly Christmas - Stampin' UP Artisan Blog Hop


Welcome back to the Stampin' UP Artisan Design Team Blog Hop! 
We are just finishing on our October 2015 box from Stampin' UP. 
This box was FULL of super fun holiday products 
from the NEW Stampin' UP Holiday Catalog!!!!!  
I am so blessed that I get to create with these amazing products and share with you all here! Remember that every Thursday of each week, all 13 of us from all over the world will post on our blogs an inspiring project for you! Be sure to get Google Translate so that you can read in your language all about how they created their projects too. Now on second to last 2014-2015 Artisan Design Team project using the Jolly Christmas Stamp Set and the Merry Moments Designer Series Paper Stack! 
We are finally covering CHRISTMAS themed products! I made two quick and easy cards and some matching gift boxes showcasing the stamp set by using "parts" of it. I used the Christmas Greeting Thinlits Dies with Jolly and Peace to complete the greetings. 
I used the White Thick Cardstock as my base and Oval Framelit layer. I like how sturdy it is to place with one layer of Designer Series Paper and even stamp on it!  I am also loving the Merry Moments Designer Series Paper Stack. 48 sheets of two double-sided designs! A gal can make alot of the same card with that! Then I got this idea...6x6 makes the cutest little box with the Gift Box Punch Board and all I have to do is use the Merry Moments Paper Stack without cutting it at all! All you need is a fancy topper, some cording or ribbon, fill it with candy,chocolate or a small item and call it DONE!

 As the stamp says...HOLLY JOLLY! So I grab some punches, Old Olive Cardstock and the Real Red PomPom Trim and came up with this. Little something I learned years ago from a class of Heather Summers. I am loving the Christmas plaid pattern of the paper stack for the gift boxes! 
Here is a little video I made showing how I made the holly leaves. 
(Still learning on the video so be patient with me, my director daughter was feeling sleepy.)
Both of these are super easy for a demonstrator to teach at a holiday stamp a stack class OR a customer to order the supplies shown at the bottom and make 24 card and 24boxes or 48 cards or 48 boxes in a few hours! 
You could mark some to do's off your Christmas list right there!

Thanks for stopping by! I hope this inspires you!
Cindy
Now move on to my friend from France, Helene Legrand by clicking on the next button below!  Be sure to stop by all 13 of us! Plenty of good ideas to get your holidays kicked off!
Built for Free Using: My Stampin Blog

Wednesday, March 11, 2015

Sheltering Tree - Stampin' UP Artisan Blog Hop

Welcome back to the Artisan Design Team Blog Hop! We are just starting on our March 2015 box from Stampin' UP. This box was full of more brand NEW products from the Stampin' UP Occasions Catalog! Every Thursday of each week, all 16 of us from all over the world will post on our blogs an inspiring project for you! Be sure to get Google Translate so that you can read in your language all about how they created their projects too. Now on to my project this 2nd week...
I am truly blessed. I am blessed because I have wonderful, caring, sweet friends all over the world! I love my friends and they each mean so much to me!

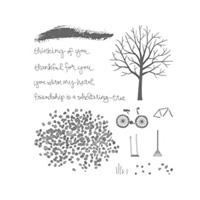
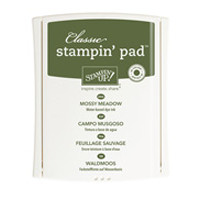
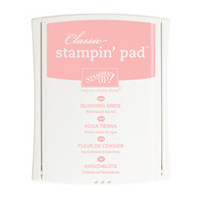
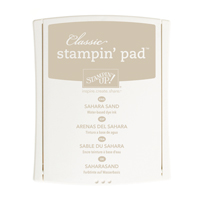
I immediately wanting to use this beautiful stamp set called Sheltering Tree. The tree reminds me of spring cherry blossoms and therefore Blushing Bride was my go to color. I paired it with Sahara Sand, Whisper White and Mossy Meadow. The bottom layer of blossoms was just stamped ink to paper. Then I stamped it again and got out my Blushing Bride Embossing Powder to emboss that layered. Did you know that the new ink pads can hold embossing powder? Stampin' UP CEO Shelli did it on a video and I HAD to try it! It works!!! I like how it adds dimension to the tree. The envelope flap is dry embossed with the Spring Flowers Textured Impressions Embossing Folder for just an added touch.
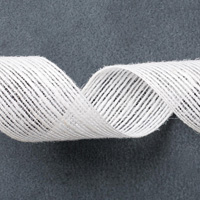
It is great when you can make a matching gift box with just a few items! Did you see that White Jute Ribbon in the Occasions Catalog? It makes such a pretty bow for a gift box. I took a 12x12 piece of Sahara Sand and use my Gift Box Punch Board. I love this size of box! Perfect to hold a little gift for a dear friend. I used the Ornate Tag Topper Punch to make my tag. Love that the larger pearls and Blushing Bride rosette trim are available in the Artisan Embellishment Kit!

I hope this inspire you!!!
Thank you my friends for always stopping by and leaving comments when you do! 
They truly make my day!
Cindy
You saw my creative twin, Becky Cowley before me with her adorable cards and now move on to my friend, Helene Legrand by clicking on the next button below! Be sure to stop by all 16 of us!

Wednesday, November 26, 2014

Gift Box and Ornaments - Stampin' UP Artisan Blog Hop

Welcome back to the Artisan Design Team Blog Hop! We are finishing up our November box from Stampin' UP. This box was full of Christmas kits and stamps from the Stampin' UP Holiday Catalog! I am so excited to share fun and seasonal projects to inspire you! Every Thursday of each week for one full year, all 16 of us from all over the world will post on our blogs an inspiring project for you! Be sure to get Google Translate so that you can read in your language all about how they created their projects too. Now on to my project this week...punch board packaging with handmade ornaments!
We received the Gift Box Punch Board in our box this month and I was so excited to finally get to play with it! Over the weekend, I made several size boxes with Whisper White cardstock to make a boxed snowman (share that later). I especially liked the 4x4x4 size box made from a 12x12 sheet of cardstock so I decided that I wanted to showcase this size as some easy to make gift boxes. Well as you can see it went way beyond that! I HAD to make something to put in them! TA DA....
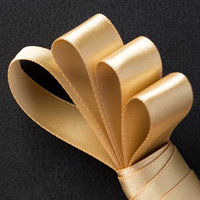
I have been seeing these ornaments all over the place. Stampin UP even made some like this for the Founder's Circle event! I used Silver Glimmer Paper and the Dazzling Diamonds Glimmer Paper to make my ornaments. They are really easy but they require you to punch HUNDREDS lots of them! One 12x12 sheet makes 2 ornaments if you punch them right. I used my hot glue gun to attach to a clear plastic ornament (local craft store) and you can follow a video HERE by the talented Dawn Griffith (LUV HER) to make them. I added Stampin UP ribbon for the bows and the twine from the kit for the hanger. I need to get some more colors of that 5/8" Satin Ribbon. It looks so pretty in the Gold! I know I am going to give these away but they look so good on my tree! Wahhhhhh!
 I wanted to make cute tags using the Under the Tree Tag a Bag Accessory Kit. I added some more patterned paper using the Trim a Tree Designer Series Paper Stack. I used a simple color combo of Pistachio Pudding, Garden Green, Crumb Cake, and Whisper White. Can you see these also done with the remaining green, red and brown tags from the kit?

Here are the close ups of each tag. Click on the photo to see enlarged. Very simple with stamped images from the Cheerful Tag Stamp Set. That is a MUST HAVE stamp set for this holiday of gift giving!
Thanks for stopping by! I hope this inspire you to create these handmade holiday gifts and packaging for that someone on your Christmas list!
Cindy
You saw my friend, Becky Cowley before me and now move on to my friend, Helene Legrand by clicking on the next button below! Be sure to stop by all 16 of us!