Thursday, September 25, 2014

Fancy Friday Blog Hop - Sketch Fancy!

Welcome to the FANCY FRIDAY BLOG HOP for a September sketch challenge!
My fancy friends and I are BACK! We loved working with each other so much that we decided to continue on with an all new blog hop to inspire you in fun new ways! Each month on the last Friday, we will bring to you new challenges of all kinds (color,sketch, stamp focus, etc) that you can even participate in!

This month's challenge is a sketch design by our Jen Timko! You can stay true to the layout and colors or pick whatever inspires you. The first thing that drew my eye was the diagonal lines. I have been wanting to use the Decorative Masks and so I angled the strips one in a diagonal and sponged Smoky Slate on Very Vanilla. I was attempting to go with a vintage look on this card. I also use the flag layer and scallop layer on my card as well.
Last month we offered a giveaway to one person who participated in the challenge.  The winner is Lauren Reeves! Here is the link to her blog post: HERE

Thanks for stopping by! I hope this inspire you today!
Cindy

You saw Cathy Caines before me and now move on to 
Connie Collins by clicking on the next button below! 

MDS Blog Hop - Summer Ends

WELCOME TO THE MDS BLOG HOP!
A bunch of us have joined together to share our passion for digital designing with Stampin' UP's My Digital Studio.  These ladies are SERIOUSLY talented in MDS and I am thrilled to be on this Blog Hop with them! You will find us blog hopping on the 2nd and 4th THURSDAYS of each month!  
For the MDS Blog Hop this time, we are sharing what we have been doing in MDS!
You would have to think that I recolored the photo how well the yellow matches this page?! That photo is unedited! Those St. George Island sunsets are THAT beautiful!

I saw a similiar sketch layout on Pinterest and it reminded me that summer is over! We are so blessed to have had an "end of summer" beach trip at our friend's new beach home. We have a great time, relaxed and just had no plans for a few days.

I think my favorite find on this page was the silver bike clip that I recolored Summer Starfruit which then make it gold. I also used two "unbeachy" downloads to make this page:
File It Fun and Domestic Goddess! Who would of thought that?

Remember my post two weeks ago when I shared my spiral notebook journals? Well they came in the very next day! They turned out PERFECT! I LOVE THEM SO MUCH! I am definitely planning on printing some more of these for Christmas gifts this year!
Thanks for stopping by! I hope this inspires you to get your MDS program and create something special!
 Cindy 
Click on the button to move on to see what Cori made!

Wednesday, September 24, 2014

Caramel Apple Treats - Stampin' UP Artisan Blog Hop

Welcome back to the Artisan Design Team Blog Hop! We are working on to our September box from Stampin' UP. This box was full of products from the Stampin' UP Holiday Catalog! I am so excited to share fun and seasonal projects to inspire you! Every Thursday of each week for one full year, all 16 of us from all over the world will post on our blogs an inspiring project for you! Be sure to get Google Translate so that you can read in your language all about how they created their projects too. Now on to my project this week...

The first day of Fall arrived on Monday and thankfully the weather here this week has even cooled down enough to really think that Fall IS really here! And with that comes apple picking time!  I hope that we can make time soon to head up to the apple orchard in northern GA for some great family time and yummy apples! I love a good apple pie! 
This cool weather and the thought of apples inspired this little cute treat! I used the Curvy Keepsake Framelit Diecut with Baked Brown Sugar cardstock to make the "caramel covered apple". I glued it down onto one of the Paper Doilies and a 2.5" Whisper White circle punch. To get the mini Real Red apple, I used the tag from the Curvy Keepsake Framelit Diecut. TIP: use your paper snips to hand cut the bottom shape of the apple shown above. 
I recently bought these 7.5" black and white straws from a local store. I cut one inch off them to make them 6.5" long. Then took the bottom 2.5" of the straw and flatten it with my bone folder so that it could slide into the curvy box opening between the two handles.
I think I will fill these treats with some of my favorite caramel candies and give them to my friends. Perhaps with an apple or two from the Ellijay orchards too!


Thanks for stopping by! I hope this inspire you today!
Cindy
You saw my friend from Utah, Becky Cowley before me and now move on to my friend in France, Helene Legrand by clicking on the next button below! 

THANK YOU FOR THE OVERWHELMING POSITIVE RESPONSE TO THIS PROJECT! YOU ALL HAVE MADE ME VERY HAPPY THAT YOU LIKED IT THAT MUCH!

Tuesday, September 23, 2014

You're Wonderful-ly Made!

I am one lucky gal that is for sure! This sweet stamp set was given to me by Stampin' Up's Concept Artist Chrissy and Assistant to CA Gwen for being on the 2013 Artisan Design Team. (SO BLESSED to work with them again this year) Even better....this was designed by Concept Artist Melody Hyde! I love that SU involves their Concept Artists to create beautiful stamp sets like this! Hello? Can I get a job there? You can read all about this story HERE.

I sat down one night and just started stamping away. I love this stamp set! Melody showed many cards on the SU Blog post that are feminine and so beautiful but it CAN work as masculine as well!

The flower images are perfect for coloring with Blendabilities! I stamped in Black Memento Ink first. I used Old Olive and Coastal Cabana Blendablities. And yes I took on the task on cutting the flowers and flag out but so worth it! 
I needed a masculine birthday card as I was creating with this stamp set. Think it would work? It did! The colors are "Steeler football" inspired. I cut the satin ribbed Hello Honey ribbon in half on this card for a thinner look. 
The last one was fun! I thought it would be cool to put a shadow on the large print image. I stamped it first in Strawberry Slush. Then I stamped it in Daffodil Delight slightly offset. Super easy and quick birthday card for any age!

Thanks for stopping by! I hope this inspires you!
Cindy

Monday, September 22, 2014

MDS Monday Sketch Challenge #83

For this week's challenge over on MDS Monday, I was responsible for creating a sketch and give you a little lesson on how to do a text on a path. Remember that feature? 
 For this sketch, you need to use the Freeform Tool to create the lines around the photo boxes and then add text to them. Need help? Go to these videos link to learn how to do it:
https://www.youtube.com/watch?v=gS2zJFgzA34
http://www.mydigitalstudio.net/video/text-on-a-path
(For a card, use one photo box and text on a path with the title.)
I kept it simple so that you can let your creativity flow on this challenge!
I love all the pages that the MDS Monday DT has brought this week! Be sure to check them out over on MDS Monday!

Challenge Guidelines:
  • Please create a new MDS project for the current challenge.
  • Provide a link back to MDS Monday or use the Challenge Graphic above within your post.
  • Link directly to your Post for this challenge, not your entire blog. (So we can find your project)
  • You can create a Card, Scrap Page or 3-D Object with the Sketch.
  • The Challenge will end on Saturday Sept 27th @ 12pm EST. 
  • Have fun! 

You can give the challenge a try and submit your own page if you click on the MDS Monday button on the right side! MDS Masters and I made it with MDS Monday runner ups are announced every week. 

 Thanks for stopping by! I hope this inspires you today to get into 
MDS Mondays and our challenges!
Cindy 

Friday, September 19, 2014

Fall and Halloween Mini Boxes - More Artisan goodies!

I seriously had way too much fun this month with all the products that the Artisan Design Team got to play with! I had to share these mini seasonal boxes today with you! They kinda of match the Halloween Card that posted today on the Stampin' UP Facebook Page and my post yesterday.
On this Halloween mini box, I stamped the carved face with Memento Black Ink all over the box. TIP- Lay the box flat by tearing the box open. I used sticky strip to glue back together. I then took my Basic Black Classic Ink and a sponge dauber to color the 1 1/4" Burlap Ribbon. You can see that I ended the ribbon perfectly on the edge of the box. Used Sticky Strip again to secure in place. The pumpkin is Tangerine Tango cardstock and stamped in Tangerine Tango with the Fall Fest stamp set. The White and Tangerine Tango Two Tone Trim finishes it off.
On this Fall mini box, everything was done the same as the Halloween mini box. Just somethings like the wooden leaf that was colored with Old Olive and placed together. I stamped the Fall Fest pumpkin on Naturals White with Crumb Cake ink. Again the Natural and Old Olive Two-Tone Trim is perfect with this box.

Thanks for stopping by! I hope this little extra Artisan project inspires you!
Cindy

Wednesday, September 17, 2014

Happy Haunting - Stampin Up Artisan Blog Hop

Welcome back to the Artisan Design Team Blog Hop! We are working on to our September box from Stampin' UP. This box was full of products from the Stampin' UP Holiday Catalog! I am so excited to share fun and seasonal projects to inspire you! Every Thursday of each week for one full year, all 16 of us from all over the world will post on our blogs an inspiring project for you! Be sure to get Google Translate so that you can read in your language all about how they created their projects too. Now on to my project this week.... 
Some of my favorite things to do as a kid each Halloween season was to carve a pumpkin and watch the classic "It's the Great Pumpkin, Charlie Brown!". The pumpkins and ghost from the stamp set Fall Fest with the Fun Fall Framelits Dies are perfect to capture that spooky Halloween setting! I used versamark with my sponge dauber and the Stars Decorative Mask. Next use the silver embossing powder with the Heat Tool. Then I just rubbed some white chalk dust to make the cloudy spooky night sky. The rest of the card is pretty straight forward but let me know if you have any questions!

Stamps
135194 (photopolymer): Fall Fest Stamp Set
136663 (wood-mount) or 136664 (clear-mount): Ghoulish Greetings Stamp Set

Ink
126953: Old Olive Classic Stampin’ Pad
131179: Smoky Slate Classic Stampin’ Pad
126946: Tangerine Tango Classic Stampin’ Pad
101731: Whisper White Craft Stampin’ Ink
102283: VersaMark Pad

Paper
121045: Basic Black Cardstock
102128: Chocolate Chip Cardstock
100702: Old Olive Cardstock
131202: Smoky Slate Cardstock
111349: Tangerine Tango Cardstock
100730: Whisper White Cardstock
135314: Silver Glimmer Paper

Accessories & Tools
133777: Hearts & Stars Decorative Masks
109131: Stampin’ Emboss Powder Silver
109132: Stampin’ Emboss Powder White
133773: Sponge Daubers
129053: Heat Tool
134576: Basic Black Baker’s Twine
113439: Big Shot Die
135856: Fun Fall Framelits Dies
104430: Stampin’ Dimensionals
White Chalk

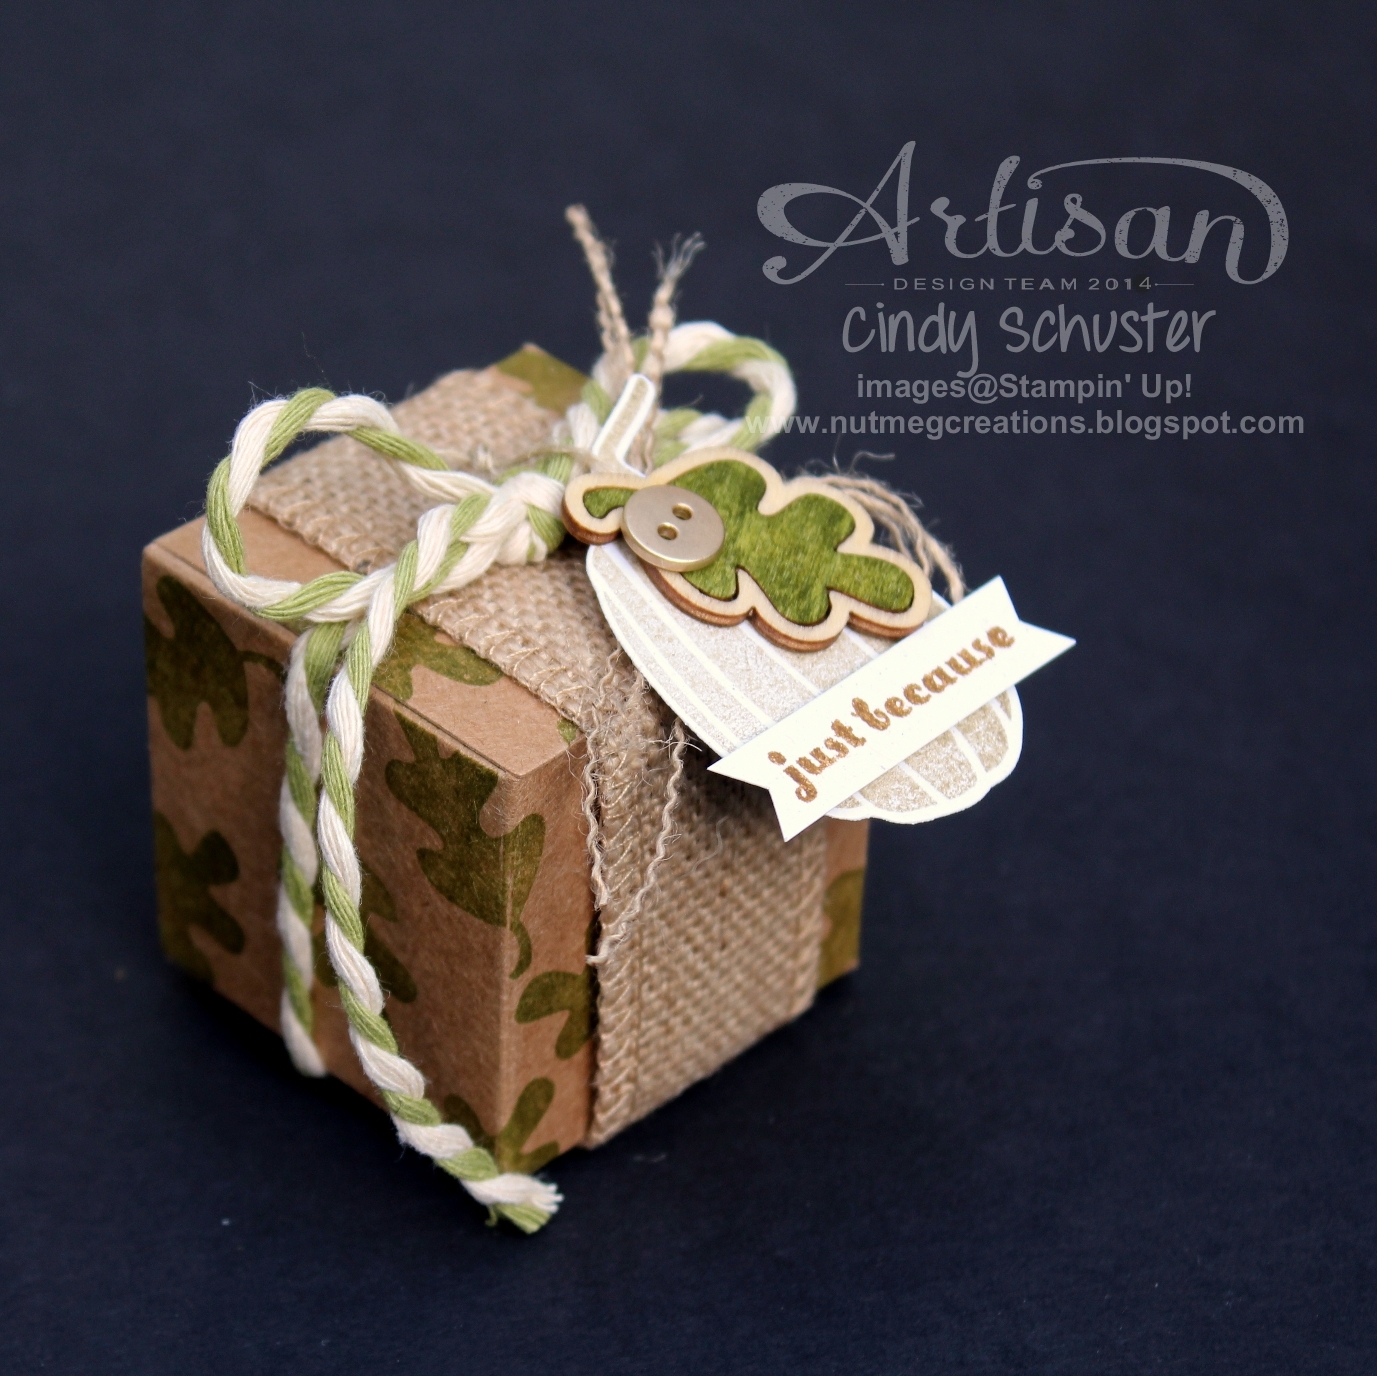
Here is a sneak peak into some little packages I made with the same stamp set and matching framelits! Check out my blog on Friday, the same day this project goes live on Stampin' UP's Facebook Page!
Thanks for stopping by! I hope this inspire you to get into the Halloween spirit!
Cindy
You saw my friend from Utah, Becky Cowley before me and now move on to my friend in France, Helene Legrand by clicking on the next button below! 

Monday, September 15, 2014

MDS Monday Sketch Challenge #82

For this week's challenge over on MDS Monday, Tara made a simple sketch with a challenge to keep it all white or very vanilla and one pop of color. I tried to make the Beau Chateau Designer Series Paper background a cream but it was not working so I went with a Basic Gray and changed the opacity to 35%. I changed the background to Very Vanilla so that it peeks thru a bit. My pop of color is Lost Lagoon on the lace trim stamp brush image. I also re-colored the pearls to Lost Lagoon. I added a drop shadow on everything to be sure it popped off the page. My parents' 47th anniversary is later this month. Very blessed to have them as wonderful parents and great example of love.

Challenge Guidelines:
  • Please create a new MDS project for the current challenge.
  • Provide a link back to MDS Monday or use the Challenge Graphic above within your post.
  • Link directly to your Post for this challenge, not your entire blog. (So we can find your project)
  • You can create a Card, Scrap Page or 3-D Object with the Sketch.
  • The Challenge will end on Saturday Sept 20th @ 12pm EST. 
  • Have fun! 

You can give the challenge a try and submit your own page if you click on the MDS Monday button on the right side! MDS Masters and I made it with MDS Monday runner ups are announced every week. 

 Thanks for stopping by! I hope this inspires you today to get into 
MDS Mondays and our challenges!
Cindy 

Thursday, September 11, 2014

Printed Spiral Bound Journals - MDS Blog Hop


WELCOME TO THE MDS BLOG HOP!
A bunch of us have joined together to share our passion for digital designing with Stampin' UP's My Digital Studio.  These ladies are SERIOUSLY talented in MDS and I am thrilled to be on this Blog Hop with them! You will find us blog hopping on the 2nd and 4th THURSDAYS of each month!  For the MDS Blog Hop this time, we wanted to share a little bit about Stampin UP My Digital Studio printing services. Many of us have printing with the previous printer that Stampin UP used and wanted to share what we have printed with the new printer service OR what we plan to print ASAP!
That is my case today...
I sent off two spiral bound journals to be printed thinking that I MIGHT have them back in time for this post. However I delayed in getting the print job sent and as a result....not here YET!  So I altered a spiral journal photo to show you how they will turn out! 

 This first journal was a project that I did a couple of years ago for Christmas gifts for my daughter and mother-in-law. It is a prayer journal. I have been finding myself needing a journal just like this to keep my grounded in faith in my busy life and so I made myself one with colors that I fancy. I used Black Chalkboard DSP from the Convention 2012 download. I changed the frame to Coastal Cabana (my fav color). Just click on the pictures to enlarge them. I love the back as it reminds me to write EACH day my peaks, my pits, my praises and my prayers. Sometimes they might be long or sometimes short so I think an 80 page journal should be enough for now.
 This journal I created way back in 2013 just as I was thinking about entering my application for the Stampin' UP Artisan Design Team for that year. It is a combination of several fonts and stamps to make the main quote. One of my favorite designs that I have ever created! I plan to use this journal for this year's ideas for the Stampin' UP Artisan Design Team. All the time I am writing ideas down as they come to me and before I forget them.

I am sorry I do not have the real project on hand. I promise to post them on the next MDS Blog Hop on the 25th of this month as well as some more MDS inspiration for you!

Thanks for stopping by! I hope this inspires you to get your MDS printed or at least design you own spiral bound journal for your thoughts and prayers!!
 Cindy 
Click on the button to move on to see what Cori made!

Remember 9-11. Remember the 3,000. Remember we are a strong nation together. 
We will NEVER forget.

Wednesday, September 10, 2014

Four Feathers Washi - Stampin UP Artisan Blog Hop

Welcome back to the Artisan Design Team Blog Hop! We are working on to our September box from Stampin' UP. This box was full of products from the Stampin' UP Holiday Catalog! I am so excited to share fun and seasonal projects to inspire you! Every Thursday of each week for one full year, all 16 of us from all over the world will post on our blogs an inspiring project for you! Be sure to get Google Translate so that you can read in your language all about how they created their projects too. Now on to my project this week.... 
 When this Artisan Design Team was asked what was our favorite things in the Holiday Catalog, we all immediately said the Four Feathers stamp set and the Feather Framelits Dies. Feathers are a very hot trend right now! I love the softness they give to any card or page you create. Given some inspiration by fellow Artisans on the blog hop lately and I came up with these. That Sweet Sadie Designer Washi Tape has been calling my name to use lately. I love the pastel colors with the black.

Here is everything you need to create this simple card in your next workshop or card class. Super easy card with a WOW that anyone can make! 
Thanks for stopping by! I hope this inspire you today!
Next week, I will be getting into the spirit of the Halloween season! Be sure to check back!
Cindy
You saw my friend from Utah, Becky Cowley before me and now move on to my friend in France, Helene Legrand by clicking on the next button below! 

Monday, September 8, 2014

MDS Monday Sketch Challenge #81

For this week's challenge over on MDS Monday, Beth made a super cute sketch with a banner and photo frames and a title like I (heart) whatever we love. I thought it was a perfect sketch to catch up on baby boy's monthly page. He will be one year old soon so I want to get this done and have it printed for his awesome parents! (our dear friends) The colors in the photo and his cute outfit are really what helped me to create this page. I color-matched the blue to his outfit blue. I used Jolly Holly download for the layers of DSP on the page. Yes it is a Christmas download but the colors are perfect here. Ever think about trying that?

Challenge Guidelines:
  • Please create a new MDS project for the current challenge.
  • Provide a link back to MDS Monday or use the Challenge Graphic above within your post.
  • Link directly to your Post for this challenge, not your entire blog. (So we can find your project)
  • You can create a Card, Scrap Page or 3-D Object with the Sketch.
  • The Challenge will end on Saturday Sept 12th @ 12pm EST. 
  • Have fun! 

You can give the challenge a try and submit your own page if you click on the MDS Monday button on the right side! MDS Masters and I made it with MDS Monday runner ups are announced every week. 

 Thanks for stopping by! I hope this inspires you today to get into 
MDS Mondays and our challenges!
Cindy 

Wednesday, September 3, 2014

Motley Monsters - Stampin' UP Artisan Blog Hop

Welcome back to the Artisan Design Team Blog Hop! We are working on to our September box from Stampin' UP. This box was full of products from the Stampin' UP Holiday Catalog! I am so excited to share fun and seasonal projects to inspire you! Every Thursday of each week for one full year, all 16 of us from all over the world will post on our blogs an inspiring project for you! Be sure to get Google Translate so that you can read in your language all about how they created their projects too. Now on to my project this week.... 
When I looked at the Freaky Friends Stamp Set, I instantly saw the three little monsters. I wanted to take them in another direction than Halloween and saw them for a kiddo space monsters theme card. To create the torn hole in the Motley Monsters Designer Series Paper, just start a hole with your paper snips and then tear back. I added dimensionals on the back of the tears to secure them in place. I placed the DSP layer on Whisper White Cardstock base. You want to mark with a pencil where the hole will show on the card. Then ink up your monsters and stamp them on the card base. Erase the pencil lines and adhere the DSP to the card base. I think my favorite detail is the Blendabilities colored rhinestone for the one monster's single eye. (one of my fav movies is Monsters Inc hence the Mike Wazowski wanna-be)

 So I had to have some fun with this next bonus project for you! I had the other piece of Motley Monsters Designer Series Paper sitting there and right next to it was this little monster and the Curvy Keepsake Box Thinlits Die. Then this funny thing happened....I saw a space rocket in the die! I cut it out of the Silver Foil Sheet and punched a oval slot for the window. The flames are the Santa Stache Stamp Set stamped in Tangerine Tango on Tangerine Tango Cardstock and cut with the Mustache Framelit. Yeah it is a stretch but it oddly works. Bwahahahaha!
Thanks for stopping by! I hope this inspire you today!
Cindy
You saw my friend from Utah, Becky Cowley before me and now move on to my friend in France, Helene Legrand by clicking on the next button below!